PC*MILER provides tools that enable you to create, modify and manage geofences. A geofence defines a geographic area that will either generate an alert when a route enters it, or will be avoided by the route. It can be used for tasks such as:
- Drawing zones around a warehouse to identify delivery/billing zones.
- Alerting dispatchers when a vehicle enters an area that it wasn’t authorized to enter – for example, leaving the country.
- Avoiding or warning about steep grades, mountain passes susceptible to snow closures, tunnels requiring escorts, etc.
- Avoiding or warning if an asset has crossed into a high crime or high accident area
- Avoiding or warning about areas where bad weather is expected or has occurred: heavy snowfalls, floods, hurricane evacuation areas, etc.
How to Create a Geofence
To see geofences on the PC*MILER map or on the map in the Geofence Manager, “Geofences” must be checked in the Map Features dialog (Map tab > Map Features). This map feature is enabled by default.
To create an individual geofence:
1. Select Tools tab > Geofence Options > Manage to open the Geofence Manager.
2. In this window, use the zoom tools and Drag Map button to zoom into the target area on the map.
3. Click the Rectangular, Circular, or Polygonal button at the top of the map.
4. If using the circle or rectangle shape, drag the cursor over the desired area.
5. If using the polygon tool, click all the points of the desired perimeter and finish by clicking on the first point again to close the polygon.
6. If you are not satisfied with the area that is covered, delete the geofence in the Available Geofences list to the right and start over.
Alternatively, you could use the map and geofence tools in the PC*MILER application window to initially create a geofence – open the Tools tab > Create Geofence and create a geofence on the map as in Steps 2-3. Then open the Manager to rename.
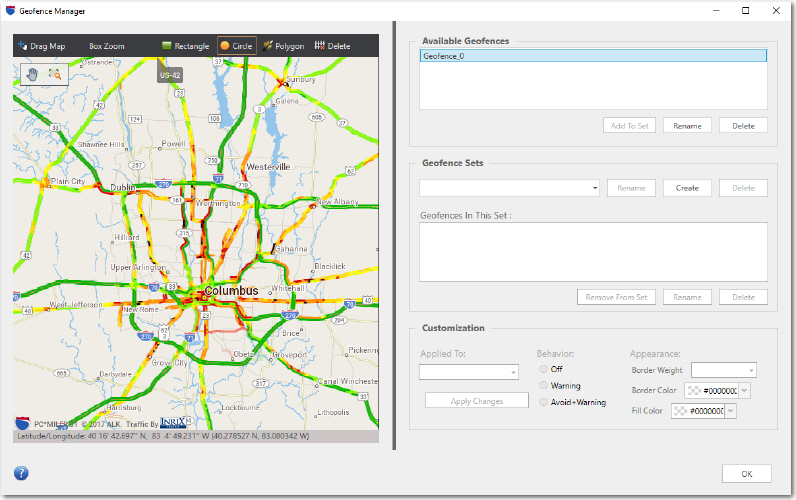
Geofence Manager
Saving a Geofence
1. In the Available Geofences list, you will see a generic name assigned (“Geofence_0”) To assign a unique name to this geofence (for example, a geographic location):
- Click on the default name.
- Click Rename below the list.
- In the prompt that pops up, type a new name.
- Click Save.
2. A geofence must belong to a set before a warning status and display properties can be assigned to it:
- Click Create under Geofence Sets.
- Type a name for the new set.
- Click Create. The set name will appear as the selected set in the Geofence Sets list.
- Go back to the Available Geofences list, highlight the geofence(s) you want to add and click Add To Set.
3.. Click OK to close the Geofence Manager. The geofence(s) you created will be saved in the PC*MILER installation folder.
TIP: To zoom to an existing geofence or set on the map in the Manager, doubleclick the geofence name under Available Geofences or the set name under Geofence Sets.
